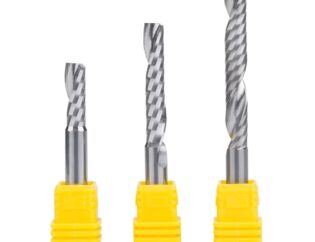
Primary motion:?This involves the rotation of the drill bit around its axis (cutting motion).
Auxiliary motion:?This refers to the linear movement of the drill bit along the axis direction towards the workpiece (feed motion).
During drilling, the inherent flaws in the structure of the drill bit can, to some extent, affect the quality of the workpiece. The machining precision is generally below IT10, and the surface roughness is around Ra12.5μm, categorizing it as rough machining.
Drilling Operation Steps
1Marking Lines
Before drilling, familiarize yourself with the pattern requirements. Use a height gauge to mark the cross-center line at the hole position according to the dimensional requirements. The center line should be clear, accurate, and as fine as possible. After marking the lines, use a vernier caliper or a steel ruler for inspection.
2Drawing Inspection Grid or Circle
After marking the lines and ensuring they pass inspection, draw an inspection grid or circle with the hole’s center line as the symmetrical center. This serves as a reference for checking during drilling, facilitating the inspection and correction of hole positions.
3Pilot Hole Punching
After drawing the corresponding inspection grid or circle, carefully punch a pilot hole. Start with a small point, observe carefully in different directions from the cross-center line to ensure the pilot hole is at the intersection of the cross-center line. Finally, punch the pilot hole firmly, ensuring accuracy for drilling alignment.
4Clamping
Clean the machine table, fixture surface, and workpiece reference surface. Clamp the workpiece securely, ensuring a flat and stable clamping for easy observation and measurement. Pay attention to the clamping method to prevent deformation during clamping.
5Trial Drilling
It is essential to conduct a trial drill. Align the drill bit transversely with the center of the hole, drill a shallow pit at the center of the sample punched hole, visually inspect its correctness, and continuously adjust to align the pit with the inspection circle. If the deviation is small, apply force to gradually correct the position.
6Bohren
Machining the hole in metalworking generally involves manual feed operation. Once the trial broaching achieves the required positional accuracy, proceed with the broaching. During manual feeding, ensure that the feed force does not cause bending of the drill bit to prevent the hole axis from skewing.
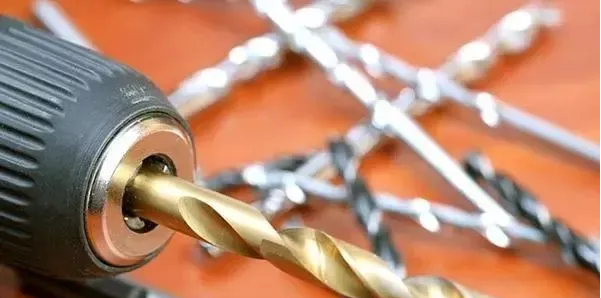
Methods to Improve Drilling Accuracy
1Well-Sharpened Drill Bit as a Prerequisite
Before drilling, carefully select and sharpen the appropriate drill bit. The sharpened drill bit should have accurate positive rake angles, relief angles, and equal lengths for the two main cutting edges. Additionally, the two main cutting edges should be symmetrical with the centerline of the drill bit, and the main relief surfaces should be smooth. To facilitate centering and reduce wall roughness, appropriate grinding of the relief and main cutting edges is necessary (preferably rough grinding on a grinding wheel followed by fine finishing on an oilstone).
2Precise Marking as the Foundation
Accurate marking with a height gauge is fundamental. Ensure accurate dimensions, and when marking, create an angle of 40 to 60 degrees (along the marking direction) between the marking needle and the workpiece marking plane to produce clear and uniform lines. Select a well-machined reference surface for marking, ensuring its own flatness and perpendicularity to adjacent surfaces. After marking the crosshair lines for hole positions, use a center punch to mark the center point on the crosshair lines (the punch point should be small and accurately positioned) to facilitate centering during broaching.
3Correct Clamping is Key
For holes with a diameter less than 6mm, if precision is not critical, hand clamping of the workpiece for drilling is acceptable. For holes in the range of 6 to 10mm, if the workpiece is regular and flat, use a flat-nose pliers but ensure the workpiece surface is perpendicular to the drill spindle. When drilling larger diameter holes, the flat-nose pliers must be fixed with bolts. For larger workpieces with hole diameters exceeding 10mm, use a clamping method with a pressure plate for broaching.
4Accurate Centering is Crucial
After clamping the workpiece, do not rush to start drilling; instead, begin with centering. Centering can be static or dynamic. Static centering occurs before the drilling machine is started, aligning the centerline of the drill spindle with the intersection of the workpiece’s crosshair lines. While this method is safer and more convenient for beginners, it may result in lower drilling accuracy due to factors like the swing of the drill spindle. Dynamic centering is performed after the drilling machine is started, considering various uncertain factors, resulting in relatively higher accuracy.
5Thorough Inspection is Essential
Inspection helps discover the accuracy of the hole promptly, allowing necessary measures to be taken for correction. For holes requiring high accuracy, a processing technique involving drilling, reaming, and tapping is often employed. After drilling a small hole in the first step, use a caliper to measure the deviation from the center of the bottom hole to the reference surface. If the deviation is less than 0.10mm, adjustments can be made during reaming by increasing the drill bit’s rake angle and weakening the automatic centering effect, gradually pushing the workpiece in the correction direction. If the deviation exceeds 0.10mm, a round file can be used to smooth the sidewalls of the bottom hole, ensuring a smooth transition with the arc of the bottom hole.


